
Gathering inspiration and putting together moodboards
- Oct 4, 2023
- 5 min read
Updated: Apr 28, 2025
So let’s talk inspiration and moodboards! Hopefully by now you've got a clear idea on how you want your room to function, what you want to use it for and a basic idea of the style you like. If you haven't seen my blog on how to pull together ideas for your space, so that you have a plan of attack before starting your moodboards, you can read it here
So let's start looking at the initial design concepts and how you can enjoy the wonderful creative process of seeing your own space come together.
Have a look at the moodboards below and I'll talk you through how to get to this stage and when you can access some great free resources if you don't know about them already.
Revival by Design
As a designer, I spend a lot of time on this stage of the process. It is this stage, along with the planning & installation stage, that takes up most of my time. This is where the value of employing an interior designer really shines through. I always try to design concepts that you may not have thought of, push the boundaries a little and take my clients out of their comfort zone, get them thinking outside the box. It always works, sometimes elements of the design need a tweak here and there, but overall people love something a bit different and I'm convinced it works because I always follow a process that means I have a clear understanding of what my clients want and need. I'm effectively taking what my clients tell me that they want from their home, and what they tell me about their likes, dislikes and preferred styles are, and putting my filter on it, to curate it and bring it together into a cohesive design.


I take inspiration from EVERYWHERE, my photo stream is insane and being a creative I'm highly disorganised and never put them into albums. What ever you see that interests or inspires you, take a photo of it. The collection of photos above, except the ones of me, have been taken when we have been out and about. Some are from London at the design centre, some at Kit Kemps Knightsbridge hotel, some from Andalusia and I think there is one there from the Harrods food hall! My point being it doesn't have to be an interior to inspire you, it can be a texture, a colour, a pattern, a colour block, or even food itself.
A great starting point for inspiration is Pinterest, it’s so easy to use and also a great platform for so much inspiration, best of all its free!
You can create multiple moodboards, which will allow you to put together ideas for different rooms and spaces, so that you can see how they will flow and work together. I use Pinterest all the time, we all need inspiration, ideas have to come from somewhere! https://www.pinterest.co.uk
Below is an idea of what your pinterest boards could look like, I haven't included ours for confidentiality reasons.
We did this with our full house redesign in Beverley. Our client was very relaxed about the whole process and really gave us free rein. Her only input was that she likes modern country styling – so this was our starting point. I took inspiration from the home itself and the location. I looked at period properties with modern country interiors and this helped our overall schemes and moodboards.

Image courtesy of Pinterest
After you have the overall inspiration for your room(s), you can begin to think about the individual elements in the space, such as wall colours, floor finishes, furniture, accessories and artwork. It's always better to do it this way round, think of the space(s) as a whole first, and then break them down. Buying individual pieces without an overall plan could mean that the room feels disjointed and a little off, you will then end up buying twice to try and fix the problem, and the room may never feel just as you want it to.
Now in my opinion, there is no exact science to creating a moodboard, scheme board, room board..... there are so many names for them! It's whatever works for you, however you feel you can best get your ideas and thoughts down and then understand and interpret them. My general go to is to completely overfill the page with ideas - I'm never lacking ideas (sometimes that's can be just as annoying as having none!) This may not work for some people, so just have a play and see what works for you. Here's a few ideas, they are all moodboards I've created for clients.


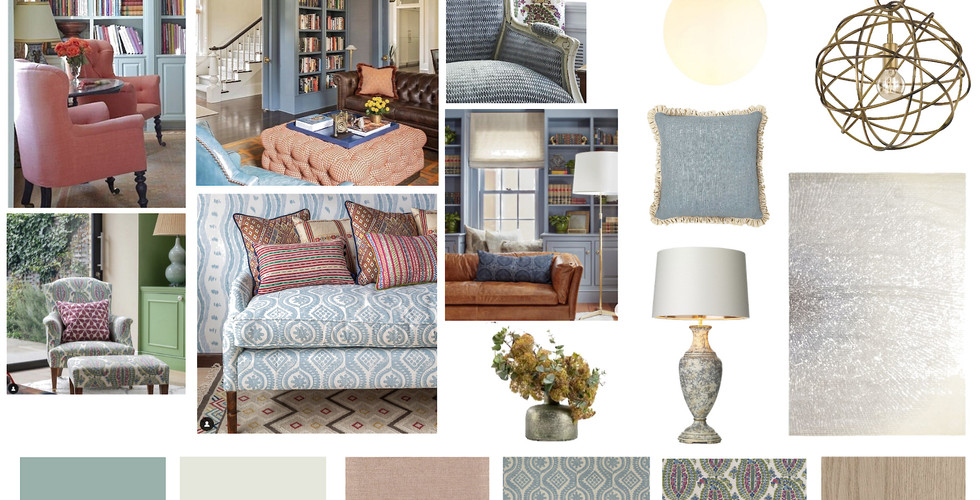


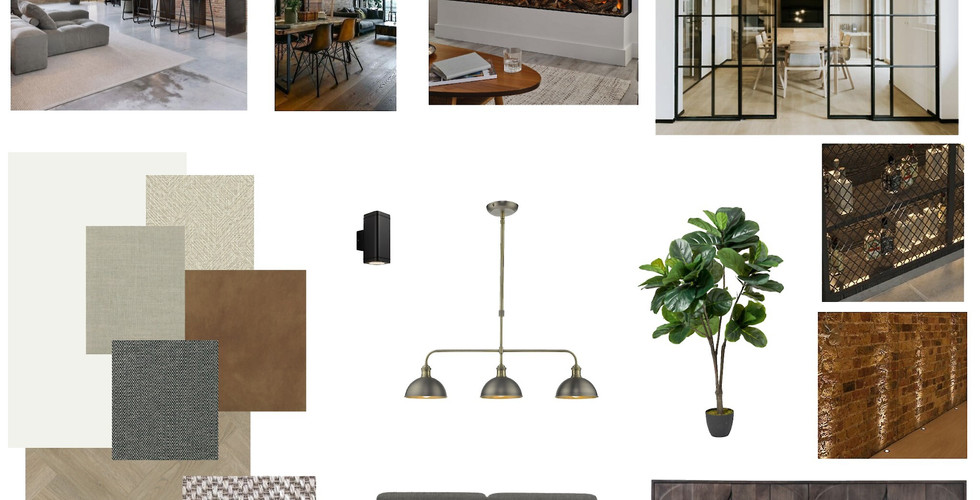


Photos Revival by Design
You will see from the moodboards that they are all different, sometimes they are more inspiration orientated, so more general photos, others more item specific and some numbered to identify different things, so that I can go into more depth for my clients. Where I am in the process will affect how specific the detailing is, not only that, each client is different and requires different levels of information.
Going back to our project I mentioned above, after agreeing with our client the overall look and feel using general moodboards, I broke each room down, so each space had it's own individual look and feel, depending on its purpose. With a kitchen and open plan dining room, sunroom, 2 lounges, bootroom and basement, 5 bedrooms, three bathrooms, home office, craft room and landings, all spread over 4 floors, it was quite a design process!
Each room then had a more specific moodboard, not yet detailing specific finishes and furniture pieces though, that comes later, but hi-lighting its overall look and feel with images of colours, fabrics and finishes.


A fantastic tool for creating a moodboards is Canva, again free for the basic access, it allows you to create moodboards with colours, finishes, furniture and accessories. https://www.canva.com/en_gb/
At this point, it's is a good idea to have some understanding of the space you have, so that when you are looking at pieces, specifically furniture, you are not selecting pieces that are either too large or small for your space. We will go into this in more detail in the next blog, so don’t worry about it right now, but it's something to keep in mind. It’s very easy when you are putting a moodboard together to see a piece of furniture that works perfectly with your scheme, only to find it won’t fit in the room or in the intended location, compromising the whole design.


Before and After - Revival by Design
So I hope you manage to collect loads of inspiration and start creating those Moodboards, enjoy the process and don't over think it!
In the next blog I'll explain how I edit my ideas and turn them into final selections. I will go through how to create a basic floor plan so that you can use this to work out where to put furniture, lighting and plumbing, as well as a scope of works and how to programme your project.


Comments